Email spoofing is a major threat. Every day, a staggering 6.4 billion fake emails flood inboxes. Over 90% of targeted cyberattacks start with email, making it critical to protect your domain and ensure your emails reach inboxes.
Here’s the solution: SPF, DKIM, and DMARC. These email authentication protocols stop spoofing, protect your brand, and improve email deliverability. Starting February 2024, Gmail and Yahoo require senders to have SPF or DKIM, and DMARC is mandatory for high-volume senders (5,000+ daily emails).
This guide walks you through setting up these protocols in Google Workspace, from verifying your domain to configuring DNS records. Learn how to prevent spoofing, improve deliverability, and monitor results effectively.
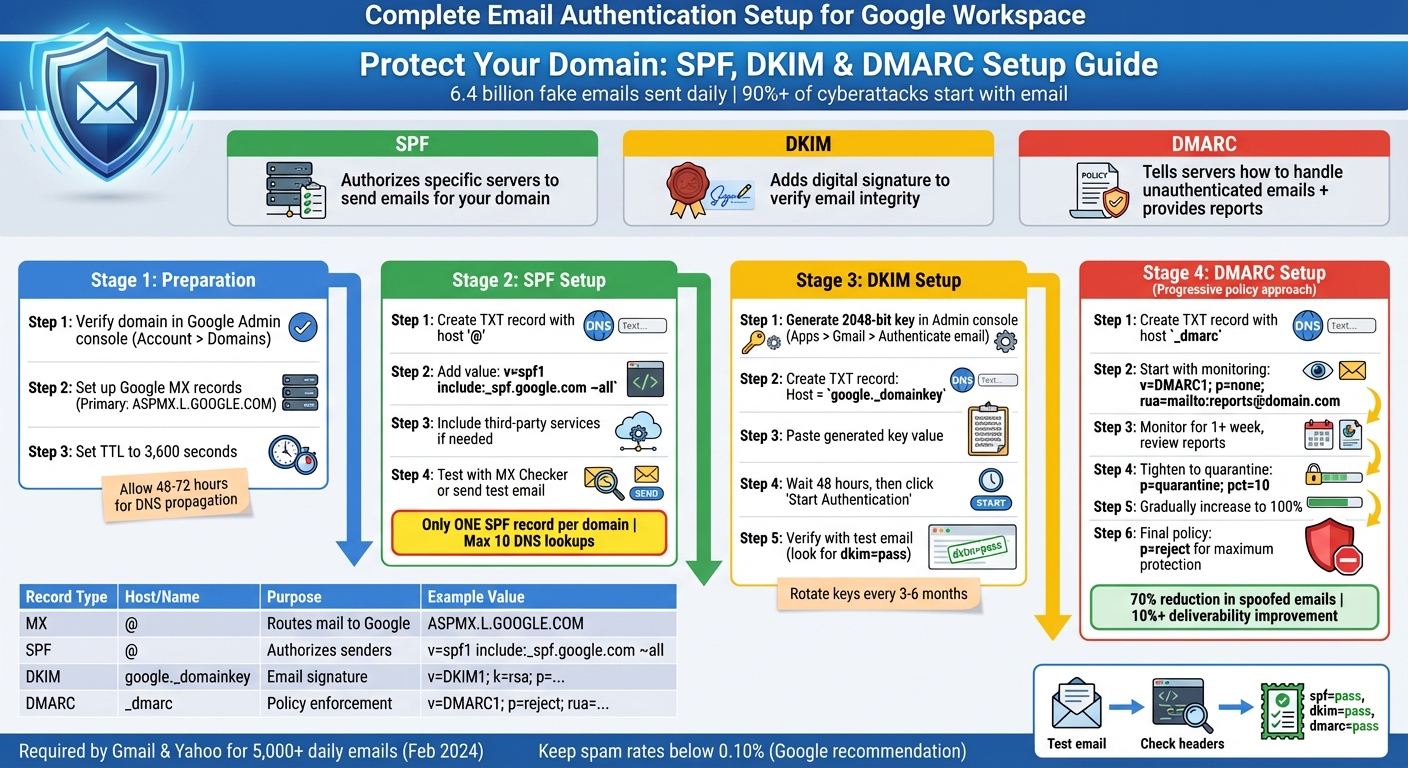
SPF, DKIM, and DMARC Setup Process for Google Workspace
Before diving into SPF, DKIM, and DMARC setup, make sure your domain is verified in Google Workspace. Proper verification and accurate DNS configuration are essential for reliable email authentication and ensure your emails are routed through Google's servers.
Start by confirming domain ownership in the Google Admin console. Go to Account > Domains to check your verification status. If your domain isn’t verified, follow the steps to add a TXT or CNAME record with your DNS provider to prove ownership. Once verified, you can move forward with configuring MX and DNS TXT records.
MX (Mail Exchange) records determine where emails for your domain are delivered. To route emails through Gmail, your MX records need to direct mail to Google's servers. This configuration must be done at your domain host, not in the Google Admin console. Google provides five MX records with different priority levels, with the primary one being ASPMX.L.GOOGLE.COM.
Use the Google Admin Toolbox "MX Checker" to confirm your setup. Set the TTL (Time to Live) value to 3,600 seconds (1 hour) for a balance between quick propagation and server efficiency. Keep in mind, DNS changes can take 48 to 72 hours to fully propagate. Make sure only Google's MX records are listed. After this, you’ll be ready to configure TXT records for SPF, DKIM, and DMARC.
SPF, DKIM, and DMARC are configured using TXT records in your DNS. These records are added at your domain host, not within Google Workspace. When creating new records, use @ in the Host field to represent your root domain, unless your provider requires the full domain name or leaving the field blank.
Be aware that each domain can only have one SPF record. Multiple SPF records can cause authentication issues and hurt email deliverability. If you’re sending emails from subdomains (e.g., marketing.example.com), you’ll need separate SPF records for each. Always review existing DNS configurations before adding new entries to avoid conflicts. Google's MX Checker is a handy tool for reviewing current records.
| Record Type | Host/Name | Purpose | DNS Record Type |
|---|---|---|---|
| MX | @ | Routes incoming mail to Google's servers | MX |
| SPF | @ | Lists authorized IPs/services for sending mail | TXT |
| DKIM | google._domainkey | Adds a digital signature to verify email integrity | TXT |
| DMARC | _dmarc | Instructs servers on handling SPF/DKIM failures | TXT |
SPF, or Sender Policy Framework, is a type of DNS TXT record that specifies which mail servers and IP addresses are authorized to send emails on behalf of your domain. When someone receives an email that claims to come from your domain, their server checks the SPF record to confirm the sender's legitimacy. Without SPF, anyone could send emails pretending to represent your organization.
By restricting unauthorized senders, SPF not only protects your domain's reputation but also shields your recipients from phishing or spam attempts. Google mandates SPF, along with DKIM and DMARC, for bulk senders - those sending over 5,000 emails daily to personal Gmail accounts.
"SPF helps to prevent senders from impersonating you, blocking spammers and other attackers from sending email that appears to be from your organization."
– Google Workspace Admin Help
For Google Workspace, the recommended SPF record is:
v=spf1 include:_spf.google.com ~all
This record authorizes Google's mail servers to send emails on behalf of your domain. The ~all qualifier, known as a "soft fail", advises receiving servers to flag unauthorized emails as suspicious rather than outright rejecting them. This approach minimizes the risk of legitimate emails being mistakenly blocked.
Before adding a new SPF record, confirm that your domain doesn’t already have one. If an SPF record exists (e.g., v=spf1 a ~all), update it by adding Google's include statement before the final mechanism:
v=spf1 a include:_spf.google.com ~all
If you rely on third-party services like Mailchimp, Zendesk, or Salesforce to send emails on your behalf, you’ll need to include them in your SPF record. Here are a few examples:
| Sending Services | SPF Record Example |
|---|---|
| Google Workspace only | v=spf1 include:_spf.google.com ~all |
| Google Workspace + Mailchimp | v=spf1 include:_spf.google.com include:servers.mcsv.net ~all |
| Google Workspace + Salesforce | v=spf1 include:_spf.google.com include:_spf.salesforce.com ~all |
| Google Workspace + Zendesk | v=spf1 include:_spf.google.com include:mail.zendesk.com ~all |
Add this TXT record to your domain host, setting the host to "@" and the TTL (Time to Live) to 3,600 seconds (1 hour) for faster propagation. Keep in mind that SPF records have a limit of 10 DNS lookups and a maximum length of 255 characters. Going beyond these limits can cause email authentication to fail.
After updating your SPF record, it’s essential to verify its functionality.
Once you’ve made changes, allow 48–72 hours for DNS propagation. You can then test your SPF setup using tools like Google’s MX Checker (available in the Admin Toolbox) or MXToolbox. These tools will confirm whether your TXT record is correctly formatted and globally visible.
For a hands-on check, send a test email to a Gmail account outside your domain. Open the email in Gmail, click the three dots next to the Reply button, and select "Show original." In the email header, look for the "Authentication-Results" section. If you see spf=pass, it means your SPF record is functioning as intended.
If your emails come from subdomains (e.g., support.example.com or marketing.example.com), ensure each subdomain has its own SPF record. Test these subdomains individually to ensure full coverage across your domain.
DKIM (DomainKeys Identified Mail) adds a digital signature to every email you send, confirming that the email originated from your domain and hasn't been tampered with during its journey. Unlike SPF, which focuses on verifying sender IP addresses, DKIM ensures the integrity of the message itself.
Here’s how it works: Google’s servers sign your outgoing emails using a private key. The receiving server then checks this signature against a public key stored in your DNS records. If the two match, the email passes DKIM authentication.
"DKIM - DomainKeys Identified Mail (DKIM) prevents your message contents from being changed during transit."
– Google Workspace Admin Help
For organizations sending over 5,000 emails daily to personal Gmail accounts, Google mandates the use of DKIM, alongside SPF and DMARC. Unlike SPF, DKIM signatures remain valid even when emails are forwarded, making it a critical component for reliable authentication. When setting up DKIM, always choose 2048-bit keys for stronger security, as they provide better protection compared to the older 1024-bit keys.
Before generating a DKIM key, make sure you’re signed in as a super administrator in the Google Admin console. If Gmail was only recently activated for your domain, you may need to wait 24–72 hours before proceeding.
To create your DKIM key:
Google will generate a TXT record that starts with v=DKIM1; k=rsa; p=.... Copy this entire string, as you’ll need it for the next step.
Next, log in to your domain provider’s DNS management panel. Create a new TXT record with the following details:
google._domainkeyHere’s a quick reference for the DNS record:
| DNS Field | Value for Google Workspace |
|---|---|
| Record Type | TXT |
| Host / Name | google._domainkey |
| Record Value | The string generated in the Admin console |
| TTL | 3,600 seconds (1 hour) |
Once you’ve added the TXT record to your DNS, allow up to 48 hours for the changes to propagate. Afterward, head back to the Authenticate email section in the Admin console and click Start Authentication. The status should update to show that DKIM is now active.
To confirm that DKIM is working, send a test email to an account outside your domain, such as a personal Gmail address. Open the email, click the three dots next to Reply, and select Show original. Look for the "Authentication-Results" section in the header. If you see dkim=pass or DKIM=OK, your setup is complete.
For added security, it’s a good idea to rotate your DKIM keys every three to six months. This reduces the risk of a compromised private key. Be cautious not to create duplicate DKIM records with the same selector, as this can cause authentication issues. If you’re sending emails from subdomains, you’ll need to add separate DKIM records for each one, as required by your DNS provider.
With DKIM in place, you’re now positioned to set up DMARC, which will help enforce your email authentication policies and provide insights into email delivery.
DMARC (Domain-based Message Authentication, Reporting, and Conformance) adds the final layer to your email authentication setup. It works alongside SPF and DKIM to ensure email servers know how to handle messages that fail authentication. While SPF and DKIM confirm the legitimacy of your emails, DMARC gives instructions on dealing with emails that don’t pass these checks.
Here’s how it works: DMARC requires that the "From" domain in an email aligns with the domain authenticated by SPF or DKIM. This alignment makes it much harder for attackers to spoof your domain. For example, an attacker might pass an SPF check using their own server, but they won’t be able to align the "From" address with your domain.
To pass DMARC, an email must meet one of two conditions: it must pass SPF authentication with alignment or DKIM authentication with alignment. This dual-layer verification makes it significantly harder for phishers to impersonate your domain.
"DMARC helps protect users from forged email messages, and lets you manage messages that don't pass SPF or DKIM."
– Google Support
DMARC also includes a reporting mechanism. Using the rua tag, it sends aggregate reports that provide visibility into all email sources using your domain. These reports help you identify legitimate third-party services, like CRMs or marketing platforms, while also spotting unauthorized spoofing attempts.
Since February 2024, Google and Yahoo! require senders delivering more than 5,000 emails daily to personal Gmail accounts to maintain an active DMARC policy. Even if your email volume is lower, implementing DMARC is crucial for protecting your domain’s reputation and ensuring reliable email delivery.
Once SPF and DKIM are set up, the next step is to create your DMARC TXT record. Log in to your DNS provider (where you added your SPF and DKIM records) and create a new TXT record with the hostname _dmarc (or _dmarc.yourdomain.com, depending on your provider).
Begin with a monitor-only policy using p=none. This allows all emails to be delivered while sending you reports on which messages pass or fail authentication. Here’s an example of a basic DMARC record:
v=DMARC1; p=none; rua=mailto:[email protected]
Replace [email protected] with a dedicated email address or group mailbox for DMARC reports. If you’re a large organization, avoid using a personal inbox, as you may receive hundreds or even thousands of reports daily.
| DMARC Tag | Purpose | Recommended Value |
|---|---|---|
| v | Protocol version (required) | DMARC1 |
| p | Policy for handling failed emails (required) | none (monitoring only) |
| rua | Address for aggregate reports | mailto:[email protected] |
| pct | Percentage of mail the policy applies to | 100 (applies to all mail by default) |
To check if your DMARC record is active, use a DMARC lookup tool or send test emails and review the headers.
Keep the p=none policy active for at least one week. During this time, review the DMARC reports to identify all legitimate email sources. Pay close attention to third-party services like Mailchimp, Salesforce, or Zendesk. If these services send emails on your behalf, ensure they’re properly authenticated before moving to a stricter policy. Once you’ve verified all legitimate sources, you can tighten your DMARC settings.
After confirming that all legitimate emails pass SPF and DKIM alignment, you can gradually adopt stricter DMARC policies. Typically, this involves three steps: starting with p=none (monitoring), then moving to p=quarantine (marking failed emails as spam), and finally transitioning to p=reject (blocking unauthenticated emails entirely).
To take the next step, update your DMARC record to p=quarantine. This tells servers to treat unauthenticated emails as suspicious and deliver them to the recipient’s spam folder instead of the inbox. For larger organizations, you can use the pct tag to apply the policy to a small percentage of emails - such as 5% or 10% - to minimize disruptions:
v=DMARC1; p=quarantine; pct=10; rua=mailto:[email protected]
If legitimate emails end up in quarantine, investigate the causes of alignment failures and adjust your SPF or DKIM settings as needed. Once you’re confident all legitimate emails are authenticated, gradually increase the pct value to 100.
Finally, move to p=reject, instructing servers to block unauthenticated emails entirely. This provides the strongest defense against domain spoofing. For instance, one healthcare organization saw a 70% drop in spoofed emails appearing to come from their domain within a week of implementing DMARC at the reject level.
A final DMARC record might look like this:
v=DMARC1; p=reject; rua=mailto:[email protected]
For BIMI (Brand Indicators for Message Identification) to work, you’ll need a DMARC policy of either p=quarantine or p=reject with pct=100. Additionally, the Payment Card Industry Data Security Standard (PCI DSS v4.0) will require DMARC by 2025 for businesses handling credit card payments.
By default, DMARC uses relaxed alignment, which allows subdomains (like marketing.yourdomain.com) to match your primary domain (yourdomain.com). If you need stricter control to prevent third parties from sending mail on your behalf, you can switch to strict alignment by adding adkim=s and aspf=s to your DMARC record.
As you implement stricter DMARC policies, keep monitoring deliverability data and reviewing DMARC reports to ensure that all legitimate emails continue to pass authentication successfully.
Once you've set up SPF, DKIM, and DMARC, you might encounter a few common problems. For instance, an SPF PermError happens when your SPF record exceeds 10 DNS lookups. To resolve this, you can flatten the SPF record by replacing "include" statements with actual IP addresses or distribute high-volume senders across subdomains.
Another frequent issue is having multiple SPF records. A domain should only have one TXT record starting with v=spf1. If you spot more than one, merge them into a single record. For DMARC alignment failures, ensure the "From:" header domain matches the domain authenticated by SPF or DKIM. Also, make sure any third-party services are properly configured to authenticate using your domain.
DKIM failures usually stem from incorrect public keys or forgetting to enable signing through the Admin Console. Refer back to the DKIM setup instructions to confirm key generation and activation. If you encounter 421 or 550 errors, check that all sending IPs have valid reverse DNS (PTR) records. These errors often arise from incomplete DMARC or DKIM configurations, as outlined previously.
| Common Issue | Root Cause | Solution |
|---|---|---|
| SPF PermError | Exceeding 10 DNS lookups | Flatten SPF records or use subdomains |
| Multiple SPF Records | More than one TXT record starting with v=spf1 |
Merge all entries into a single SPF record |
| DMARC Fail (Alignment) | "From:" header domain doesn't match SPF/DKIM domain | Ensure third-party senders authenticate using your domain |
| 421 / 550 Errors | Sending IP lacks a PTR record or is blocked | Set up valid reverse DNS (PTR) records for all sending IPs |
| DKIM Fail | Incorrect public key or signing not enabled | Re-generate keys and enable signing in the Admin Console |
These challenges highlight the importance of using automated tools to monitor and address issues efficiently.
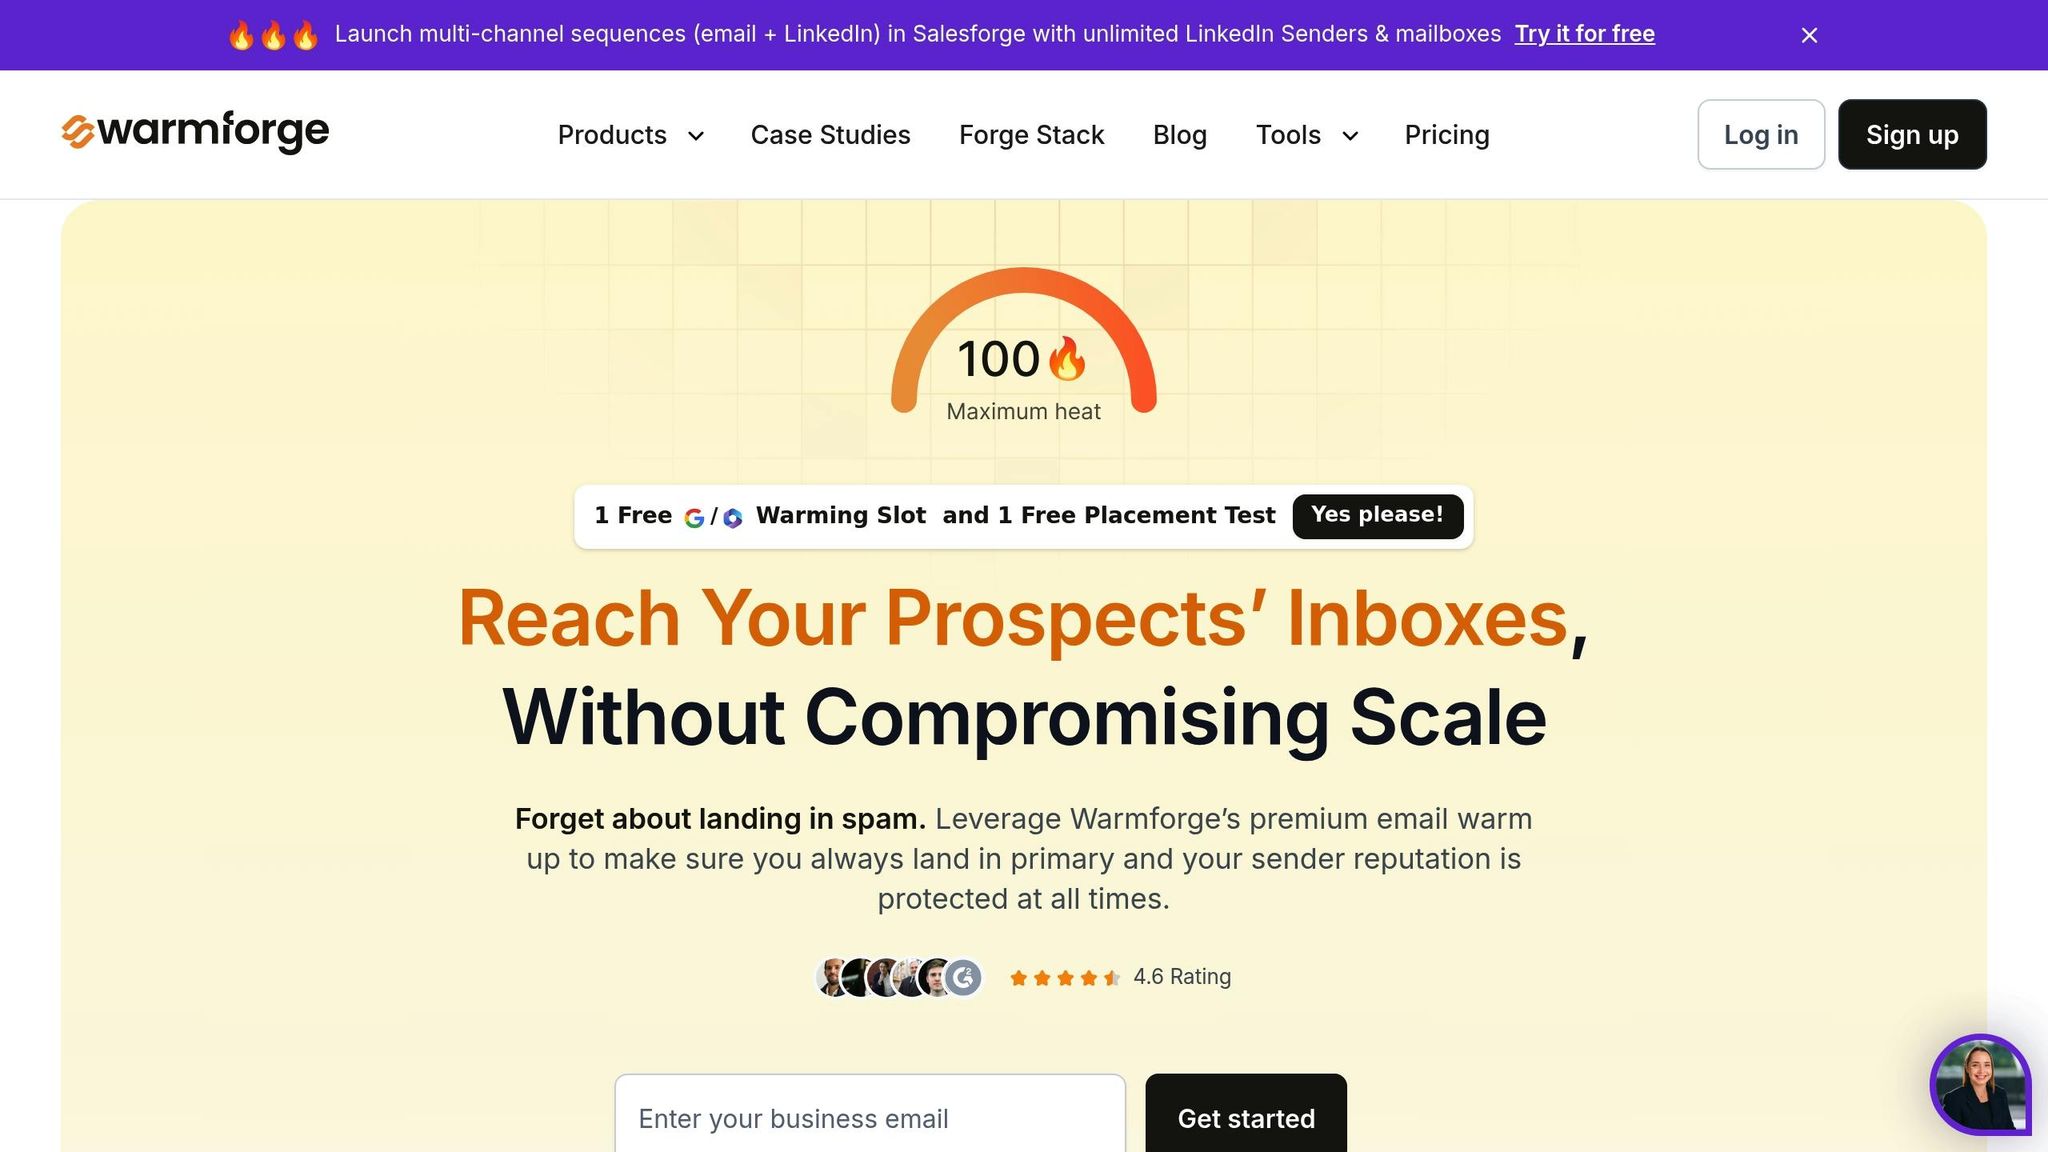
Manually monitoring DNS and email authentication can be a tedious and error-prone task. This is where Warmforge comes in handy. It automates DNS health checks, identifying authentication issues before they harm your domain's reputation. Warmforge continuously monitors SPF, DKIM, and DMARC configurations, notifying you of any misalignments or spoofing attempts.
In addition to monitoring, Warmforge offers automated email warm-up to help establish trust with ISPs like Gmail and Outlook. By gradually increasing your sending volume and mimicking human email behavior, the platform ensures your domain maintains a positive sender reputation. This feature is especially useful after implementing stricter DMARC policies, as it helps build a solid reputation for your domain.
Warmforge also provides one free warm-up slot per Google or Microsoft mailbox, allowing you to try the service without upfront costs. Other features include blacklist scanning and MX record verification, giving you a comprehensive view of your email infrastructure. For organizations managing multiple domains, Warmforge supports bulk DNS updates and custom domain tracking, ensuring consistent authentication across large-scale campaigns. Regular placement tests further confirm that these measures improve inbox delivery.
Setting up proper authentication is just the first step; ensuring your emails land in the primary inbox is equally important. While Google Postmaster Tools offers insights into spam rates and domain reputation, it only covers Gmail-specific metrics. To get a broader view across all major providers, regular inbox placement tests are essential.
Warmforge includes one free placement test per month, allowing you to check whether your emails are delivered to the primary inbox or spam folders on platforms like Gmail, Outlook, and Yahoo. These tests help verify that your authentication setup is working as expected.
Google advises keeping spam rates below 0.10%, with anything above 0.30% being a red flag. Regular placement testing helps you stay within these limits. When reviewing email headers, look for "spf=pass", "dkim=pass", and "dmarc=pass" to confirm proper authentication. It's worth noting that between 75% and 80% of domains with DMARC records struggle to enforce policies effectively, making continuous monitoring a must to maintain strong deliverability.
SPF, DKIM, and DMARC work together in Google Workspace to create a strong shield against email spoofing and phishing attempts. Here's how they function: SPF verifies which servers are allowed to send emails on your behalf, DKIM ensures your email content stays intact during delivery, and DMARC tells receiving servers how to handle emails that fail authentication. These protocols are critical in combating the staggering 6.4 billion fake emails sent every day.
Once you've set up your DNS records, follow a step-by-step approach to configure authentication. Start with SPF and DKIM, allowing at least 48 hours for DNS changes to propagate. Afterward, enable DMARC with a p=none policy to monitor activity. Gradually tighten your DMARC policy to p=quarantine or p=reject for better protection. In fact, moving to a strict "reject" policy can improve email deliverability by more than 10% with providers like Gmail.
But setting up these protocols isn’t a one-and-done task - ongoing monitoring is crucial. Since over 90% of targeted cyberattacks originate from email, regular audits of your SPF, DKIM, and DMARC settings are essential to keeping your defenses strong. Automated tools, like Warmforge, can simplify this process by performing DNS health checks and placement testing to ensure your emails land in the inbox, not the spam folder. Warmforge even offers one free warm-up slot for Google or Microsoft mailboxes and a free placement test each month, making it easier to verify your setup without additional costs.
SPF, DKIM, and DMARC are key protocols that help protect your domain from email spoofing and phishing.
When configured correctly, these protocols work together to block unauthorized emails, protect your domain’s reputation, and enhance email deliverability. For businesses using Google Workspace, implementing SPF, DKIM, and DMARC is a critical step to strengthen email security and defend against phishing attempts.
To protect your Google Workspace domain from spoofing and phishing attempts, it's essential to configure SPF, DKIM, and DMARC by updating your DNS records. Here's how to get started:
v=spf1 include:_spf.google.com ~all. This authorizes Google’s mail servers to send emails on behalf of your domain.
v=DMARC1; p=none; rua=mailto:[email protected]. As you gain confidence in your setup, you can adjust the policy to quarantine or reject to block unauthorized emails.
Once you've configured these records, use tools like MXToolbox or Google’s CheckMX to verify your setup. Keep in mind that DNS changes can take up to 48 hours to propagate. It's also a good idea to regularly monitor DMARC reports to ensure your domain stays secure.
Pro Tip: Tools like Warmforge can make this process easier by keeping tabs on your SPF, DKIM, and DMARC health. They can alert you to any issues and even run placement tests to help ensure your emails land in the primary inbox.
Regularly checking and updating your SPF, DKIM, and DMARC settings is key to keeping your domain safe from spoofing and phishing attempts. These protocols verify that only approved senders can use your domain, but they need to be updated whenever you add new email services or make changes to your infrastructure.
Staying on top of these settings helps prevent your legitimate emails from being mistaken for spam or outright rejected. It also allows you to catch misconfigurations or unauthorized use of your domain, protecting your brand's reputation and ensuring your emails land where they’re supposed to. Tools like Warmforge make this easier by offering automated checks, alerts for unusual activity, and in-depth deliverability reports, giving you the tools to act fast and maintain secure, dependable email communication.